Microsoft Flight Simulator: ILS - automatic landing
Microsoft Flight Simulator 2020 guide, tips
From this part of the Flight Simulator 2020 guide you will learn how to perform an automatic ILS landing. We're showing what to do to make the plane land virtually on its own. We show the necessary steps to prepare for this stage of the flight.
An ILS (Instrument Landing System) is a radio navigation system to assist in landing, especially in conditions of complete lack of visibility at night or in bad weather such as fog. There are three categories of the ILS system and some of them can actually bring the aircraft down to a ceiling of 0, i.e. straight into the runway. In practice, however, pilots deactivate the Autopilot at least a few hundred feet above the ground and conduct the final phase themselves.
In the game, it works in such a way that the plane can actually fly itself to the runway, but if you do not immediately take control of it, it will be a very "ugly" landing, with the so-called. a kangaroo, which means bouncing off the runway. So it's worth doing it like real pilots and taking the controls before the touchdown phase.
You will need to prepare yourself landing by recording information about the ILS frequency of the airport, the name of the key navigation points over which the ILS is activated, and the altitude at which you should be located. You can find them in your flight plan in World Map mode, or you can feel like a real pilot and use the online, the so-called airport charts.
Here are step-by-step steps to make landing as easy as two mouse clicks.
- Important info
- Introducing the information into the system in the cockpit
- Planned flight
- ILS activation
- End - final stage
- Differences in other aircraft - Daher TBM 930
Important info
1 - Plan ILS system use for a specific runway as early as during planning the flight in World Map mode. Theoretically, this can be done later in the cockpit, but the degree of complexity is incomparably bigger.
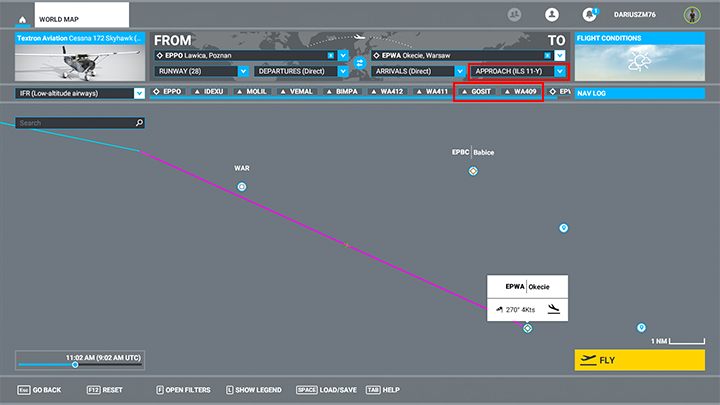
Choose the initial airport as departure and destination as arrival (Set as departure). Set the route as an "instrument flight" (IFR) on low air routes (high for intercontinental routes). For small aircraft (e.g. Cessna 172) reduce the target altitude to a maximum of a few thousand feet.

2 - Choose the Approach type as ILS for the runway number convenient to the direction you are coming from, so that you do not have to circle the airport. Zoom in on the airport if needed.
Note the new navigation points that have emerged, especially the last before the name of the airport (in our example it's GOSIT, WA409). Arrival selection is optional - if you want to land as soon as possible leave it as Direct.
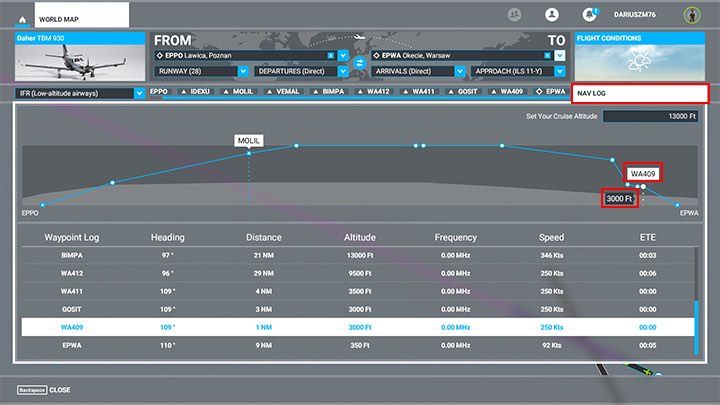
3 - Display the NAV LOG and remember the altitude for the last navigation points. Arriving at them, you're going to have to be more or less at that ceiling. For different airports, it may have a slightly different value. In the case of Warsaw and runway 11, we are interested in point WA409 and the 3,000 ft ceiling.
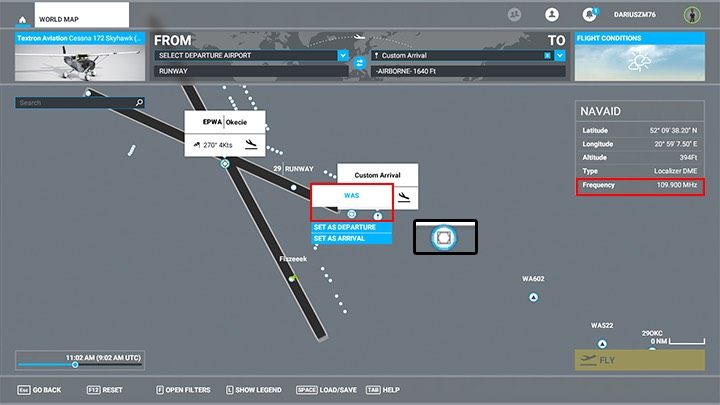
4 - Frequency! The last very important thing is the radio frequency of the ILS system for the chosen lane. For detailed instructions on how to display it in the game, see the FAQ section (you must enable navigational aids in the World Map filters). Click on the small square symbol at lane 11 and check the NAVAID table. Write down the frequency somewhere on the side - in this case it's 109.90. The height of the runway above sea level (Altitude) may also be important, as here it is as high as 394 feet. This is important in case of bad visibility.
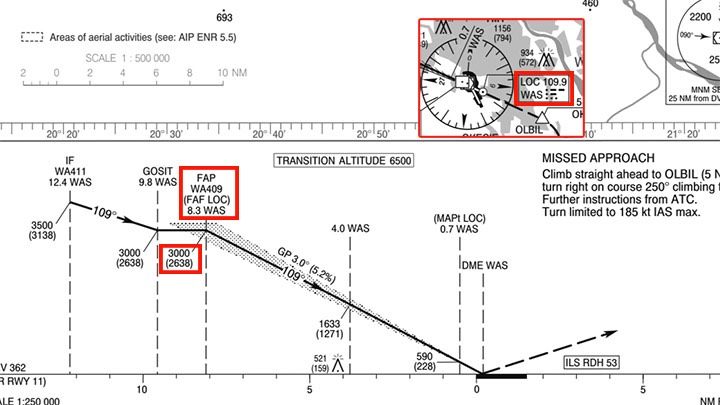
5 - OPTIONALLY - you can feel like a real pilot and find the same information in real airport documentation. When searching for the airport codes on the internet, enter "charts" (e.g. EPWA charts), you can easily find the ILS pages for a particular lane, and in them what we have just determined, which is the last navigation point to include ILS (WA409), the altitude at that point (3000 ft.) and ILS frequency and code (109.90 WAS).
Introducing the information into the system in the cockpit
Once in the cockpit, the flight plan will already be loaded into the navigation system, with the exception of the ILS frequency. You have to do it by hand.
1 - Locate the frequency window for NAV navigation and the data input knob. There are other values out there at the moment, not 109.90. By pressing the knob, you switch between NAV1 and NAV2 for quick access to several navigation modes, but we stay with NAV1.
Very important! Highlighted numbers in the white rectangle is an editable value! The active frequency is the one on the right side of the arrows: 110.50 LOD.
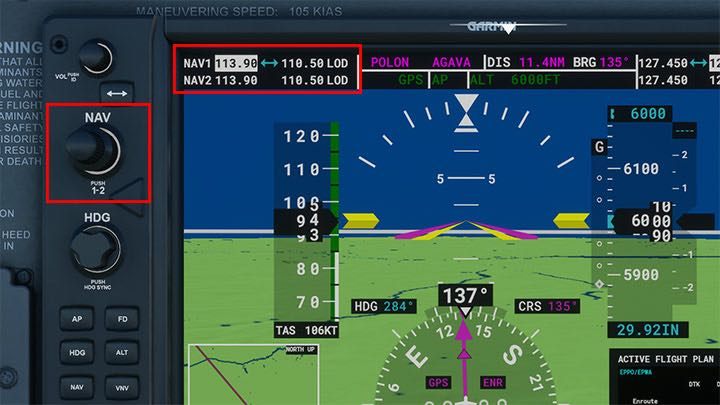
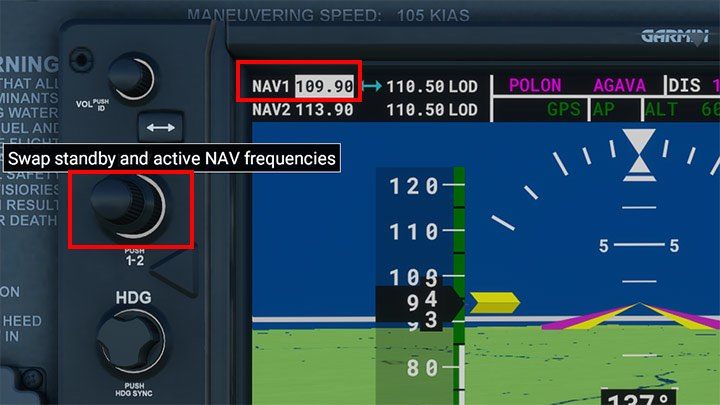
2 - Turn the knob to change the frequency to 109.90. Note the double action of the knob - a wider base and narrower end.
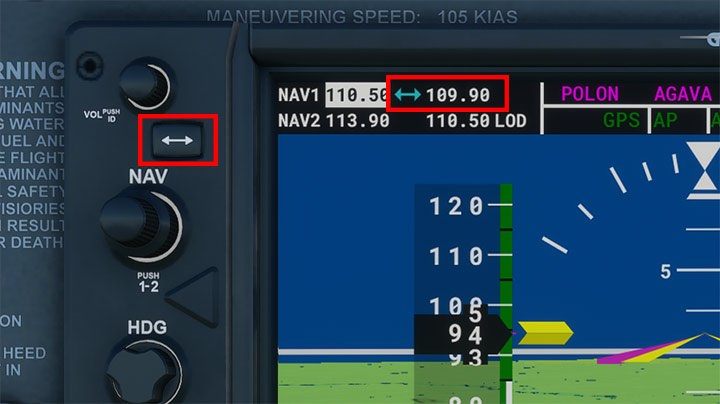
3 - Use the double arrow button to move the edited frequency to the "active" page. It will work properly when the value is on the right.
Planned flight
Use the information found in Autopilot section and follow the designated route. Check the navigation points on the flight plan to start lowering at the right time. Remember that at GOSIT, WA409 (or other values - depends on the airport) you should already be at an altitude of 3,000 feet. Pay attention to the frequency window. When entered correctly and active, code letters will appear near the target runway (for runway 11 WAS) - a sign that the signal is received correctly.
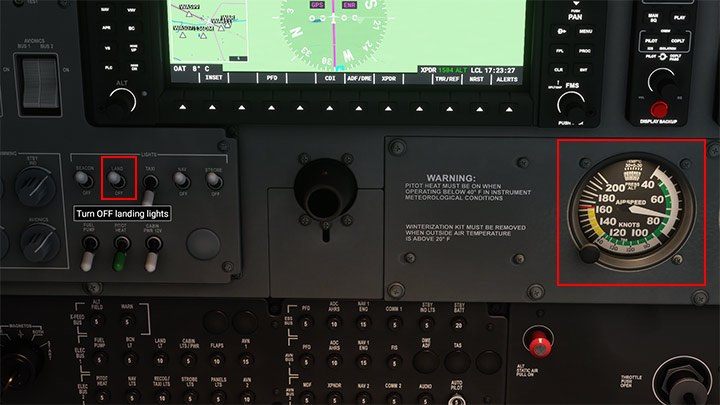
Maintain speed appropriate for the aircraft (for the Cessna 172, the descent rate for landing is approx. 70 knots), altitude (before the last navigation points you should be close to your destination, in this case, 3,000 feet) and fly with the help of autopilot (GPS modes, ALT (VS if you keep descending).
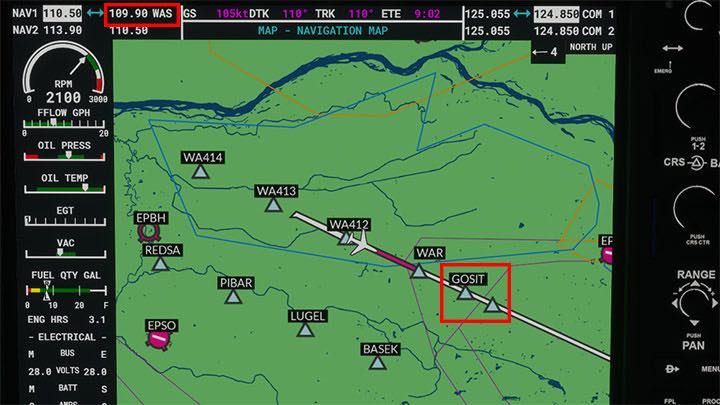
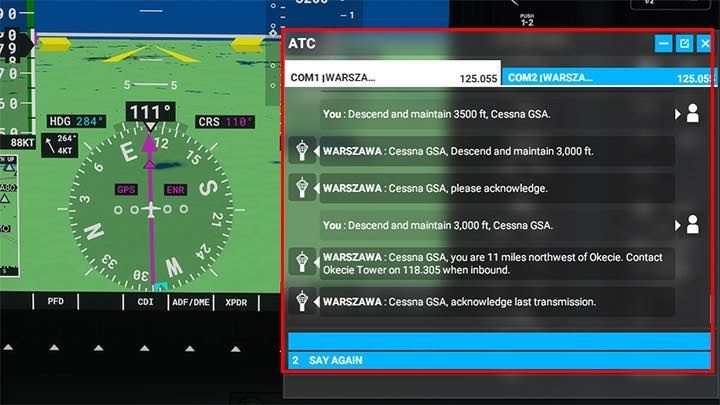
If you haven't given AI control over the ATC tower, you'll have a lot of messages to click on along the way. The information from the tower should tell you a lot of things, such as altitude, but the virtual controller can sometimes get confused.
At this stage of the flight, remember the flaps, increase the fuel mixture to 100 percent, keep an eye on engine rotations to maintain a constant speed. Turn on the landing lights.
ILS activation
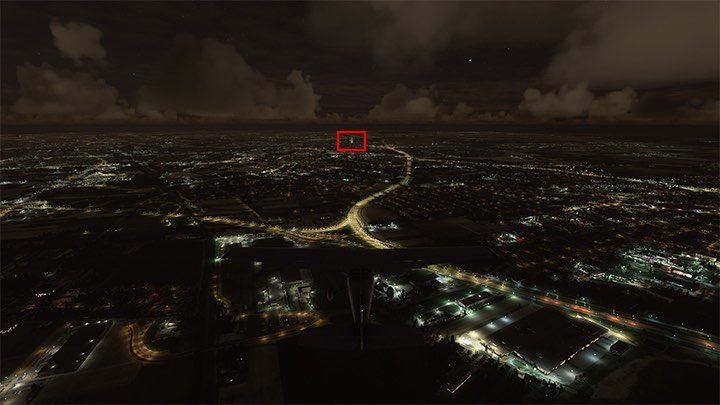
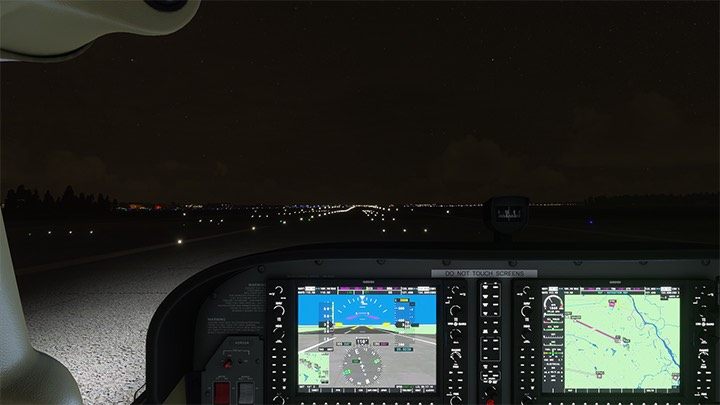
We're on the last line, over GOSIT's navigation point, and in a moment we'll be over WA409, the ILS activation site. We have to fly at 3,000 feet, at a speed of about 70 knots, and with the active ILS frequency. Time for a terrifying landing in absolute darkness, which is... two mouse clicks!
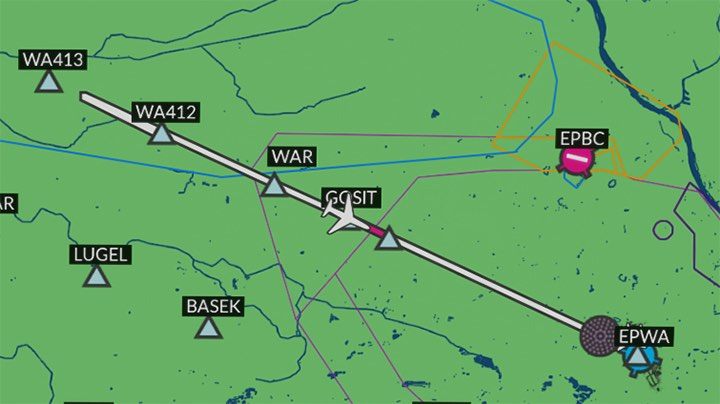
There are two activities waiting for you above the last navigation point:
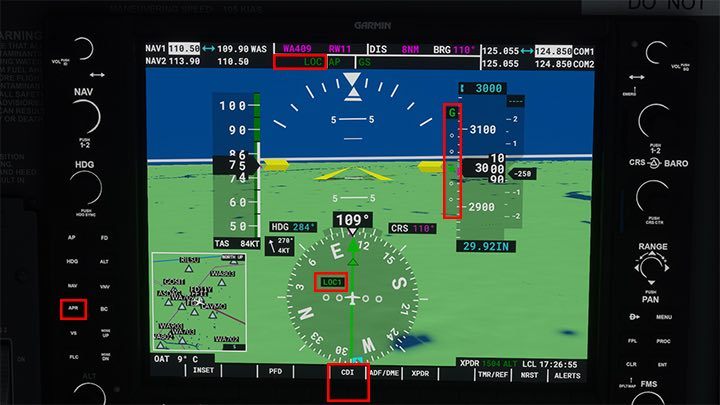
- Press the CDI button to activate LOC1 navigation instead of GPS
- Press APR (Approach) mode on Autopilot for the plane to descend on the standard 3 degree glideslope path.
That's it! Note the changes on the display. The course line on the HSI is now Green, the active navigation mode is LOC1, and next to the altimeter there is a glideslope indicator. From this point on, the aircraft will gradually lower the flight while maintaining a course centrally to the middle of the runway.
Your job is to watch the speed to go down to 60 knots with the flaps out and maintain that speed without any sudden changes.
End - final stage
1 - for the most of the descent, control your speed, and admire the views (if you see anything). The plane will land without touching the steer.
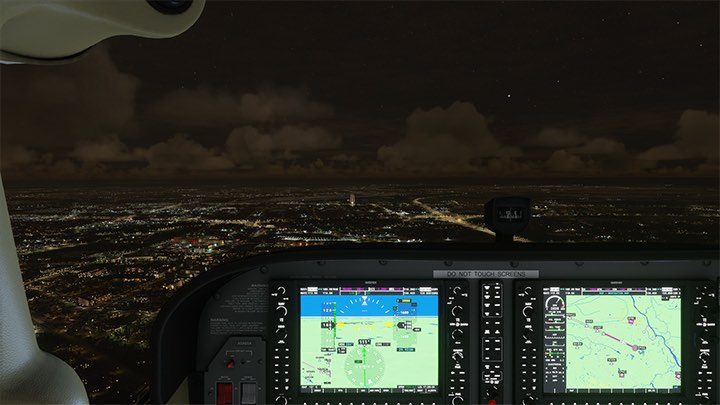
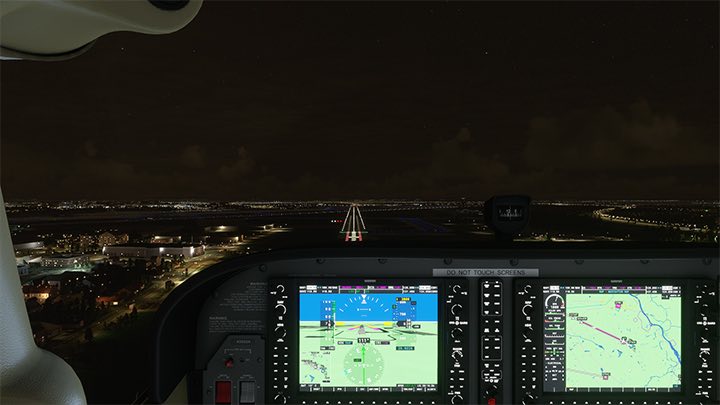
2 - Get ready to take control of the airplane before the runway. Different pilots have different rules. Some take control as early as 1,000 feet, others at 300. A lot can also depend on the weather - if there are any strong wind gusts, it's worth taking control early.
Click on the AP main autopilot button or press the Z key. From this point on, you have full control of the aircraft. Don't make any sudden movements, just continue the descent by keeping an eye on the speed.
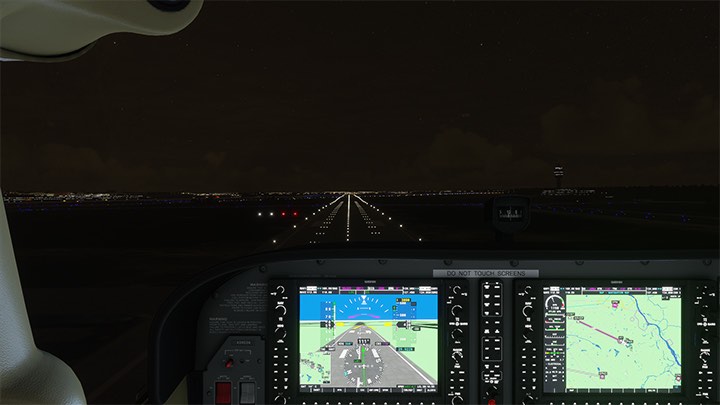
3 - while over the runway reduce power to zero and start gliding. Allow the machine to sit gently on the lane as it loses speed. When you hear the clapping, the plane is already rolling down the runway. Control the rudder to keep the course straight, activate the wheel brakes if you need to. All that remains is taxiing to a parking spot.
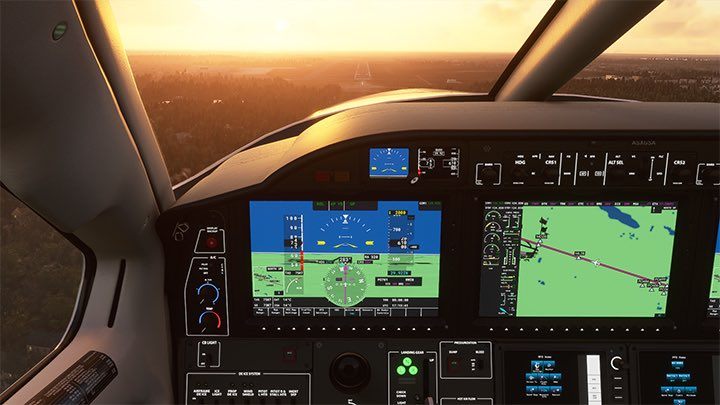
Differences in other aircraft - Daher TBM 930
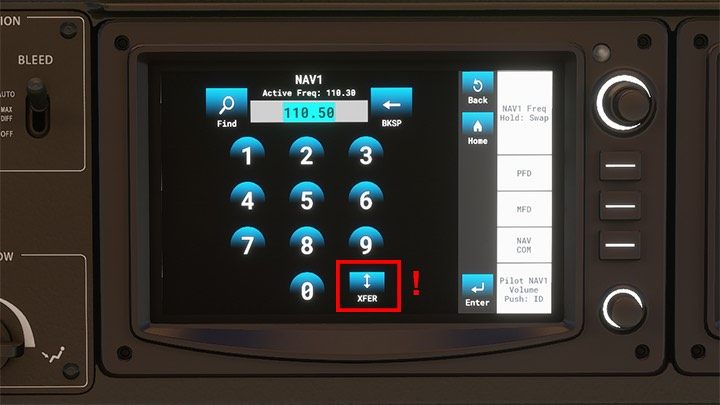
In other aircraft models, the activities used to activate ILS may differ slightly. This is the case, for example, in the Daher TBM 930, where the introduction of the ILS frequency takes place quite differently.
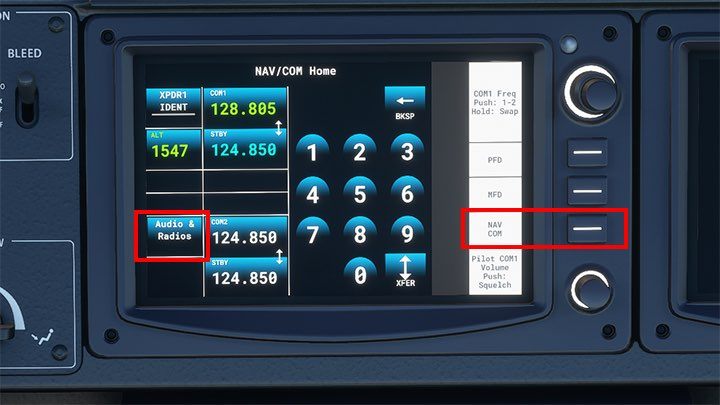
1 - note the small touch panel under the second MFD screen. Select the NAV COM section with a physical button on the side and then press the "Audio & Radios" button on the touchscreen.
2 - Select NAV1 window.
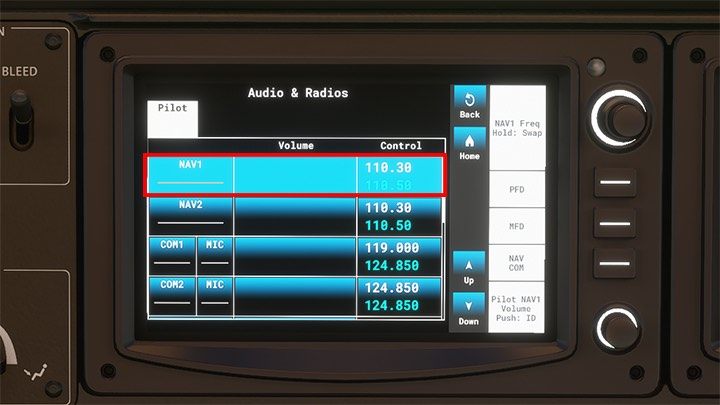
3 - Enter a specific frequency and IMPORTANT click on the button with the arrows to activate it immediately!
No hay comentarios:
Publicar un comentario